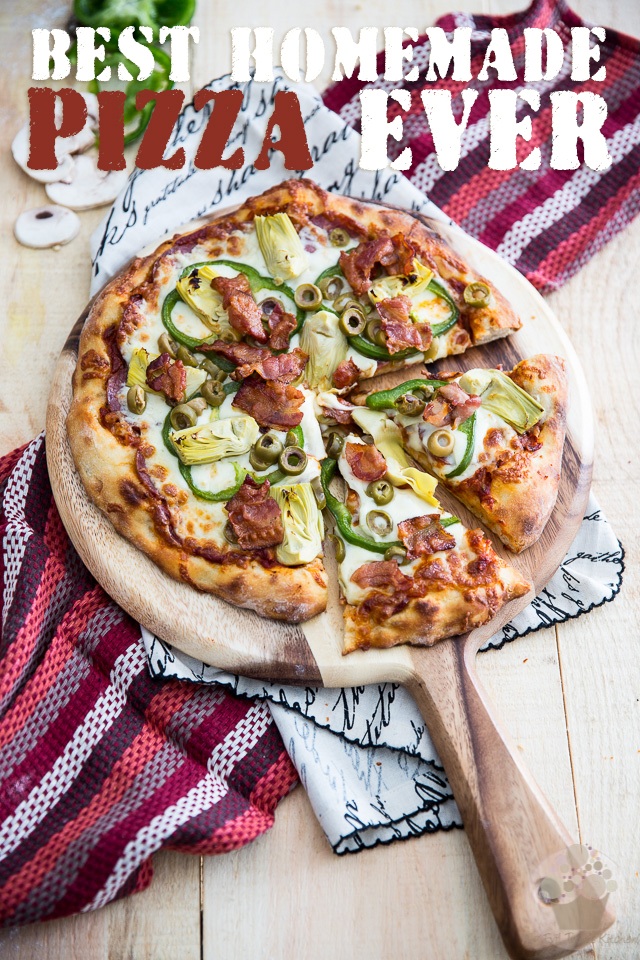
THE BEST HOMEMADE PIZZA EVER!
I learned to love pizza from a very early age. I guess the fact that my dad worked for a top notch pizzeria for close to 20 years and that my parents actually met at said pizzeria (my mom also used to work there, at the time) has something to do with that…
Or perhaps it’s because of the local kids…
Let me explain: every so often, mischievous teens would place phony orders and have pizzas delivered to fake addresses or to people they “knew” and wanted to play a trick on. I don’t know whether this phenomenon still exists today with all the modern technology and tracking devices and all, but back then, it was surprisingly common. As annoying as it must have been to the owners, instead of trashing the superfluous pizzas, they would give them to their employees to bring home. Thanks to the little rascals, my dad would often come home from work holding one or two of the familiar square boxes in his hands, much to our delight!
Needless to say that to this day, I still love me a good pizza on occasion! I tried many, many times to make a decent one at home, because you know, when I make my own, I get to choose exactly what toppings and how much of it get to dress my pizza. Truth be told, tough, I never was fully satisfied… UNTIL NOW!
You see, the thing is for me, the crust is what totally makes or breaks a pizza. Sure, the sauce and toppings also have a big role to play, but if the crust isn’t right, then the whole experience is sort of impaired.
When I have pizza, I DEMAND a crust that’s nice and chewy, thick but not so thick that it takes all the place, dense but soft and pliable at the same time, crispy and tasty, just like a good bread, with LOTS of nice large bubbles in it. Up until recently, I thought there was no way one could ever achieve such results at home simply because our ovens don’t get nearly hot enough.
That was until I discovered the magical tool that’s known as a pizza stone!!! You place one of these babies in the oven to preheat for about an hour before you cook your pizza, so it has a chance to get really really hot, and you have a set-up that’s pretty comparable to that of the best pizzerias of this world.
If you’ve not tried that yet, do it. You will not believe the difference that cooking your pizza directly onto a super hot stone will make.
Of course, you also need a good pizza dough recipe to start with. Lucky for you (and for me) I just found one that’s pretty darn near perfect! At least it is to me…
Sounds interesting? Keep reading!
The Best Homemade Pizza EVER!
Yield: 2- 10" pizzas
Ingredients
For the pizza dough
1 ball of pizza dough (I usedthis recipe)
The sauce
1 tbsp extra-virgin olive oil1/2 small onion, finely chopped2 cloves garlic, minced½ tsp Himalayan salt¼ tsp freshly ground black pepper1 tbsp dried oregano1 tsp onion powder1 tsp garlic powder¼ tsp fennel seeds, coarsely ground¼ tsp red pepper flakes2 cups (480ml | 16oz) crushed tomatoes
The Garnish
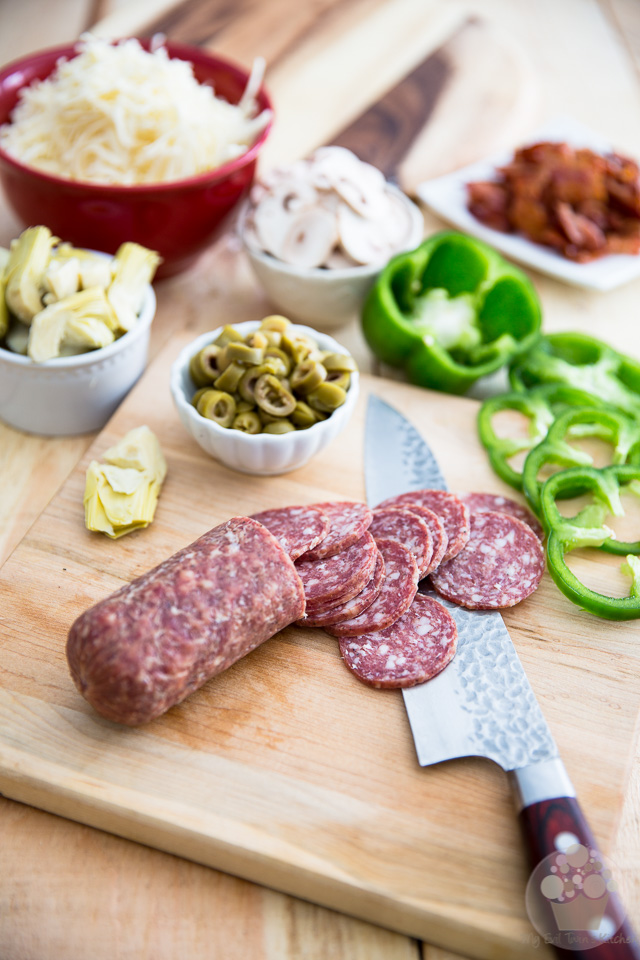
6 slices bacon200g (7oz) dry salami, thinly sliced1/4 cup sliced green olives3 cups (300g | 10.5oz) grated mozzarella cheese1 small green pepper, seeds and membrane removed, sliced4-5 medium white mushrooms, thinly sliced4-5 quartered artichoke hearts, drained
Instructions
The previous day, get started on your pizza dough so it has a chance to proof overnight.While you're at it, you can also make the sauce, so it has ample time to cool before you use it (or you could make it the next day, while your dough is proofing for the second time)To make the sauce, heat the olive oil in a medium saucepan placed over medium heat and then add the chopped onions, garlic and seasonings; cook until fragrant and the onions become translucent, 2-3 minutes.Add the crushed tomatoes and bring to the boil then lower the heat and simmer, partly covered, for about 15-20 minutes, or until the sauce is thickened.When your dough is done proofing for the first time, preheat your oven to 550°F and place your pizza stone on the middle rack. You'll want to leave your stone in there for about an hour so it has a chance to fully preheat.Meanwhile, get your pizza dough ready for its second proofing.While the dough is proofing for the second time and the stone is heating up, prep your garnish and par-cook your bacon: cut it into 1½" chunks and cook it until soft and chewy. I find a good way to do this is to throw it into a broiler pan and then place that pan directly onto your hot pizza stone for 2 to 3 minutes.Next, use a large round dinner plate to trace 2 circles onparchment paper. You'll be using these to place under your pizzas and ensure that they won't stick to your pizza peel as you slide them onto the pizza stoneWhen your pizza dough is done proofing for the second time, delicately stretch each ball with your fingers until it's approximately 10" and then move them to your prepared parchment paper circles.Divide the sauce between both discs and spread it in a thin layer, not quite all the way to the edge. Top with the salami, sliced mushrooms, followed with grated cheese. Finish with the sliced bell peppers, quartered artichokes and sliced green olives.Delicately transfer the pizzas onto the preheated pizza stone and cook until the crust is poofy and brown and appears crunchy, and the cheese is fully melted and starts browning around the edges, about 8 to 10 minutes.When there is about one minute left of cooking time, add the bacon so it has a chance to crisp up.
STEP-BY-STEP INSTRUCTIONS AND PICTURES
I didn’t include step-by-step pictures to make the pizza dough because frankly, I used the recipe exactly as it appears on King Arthur’s page, and that post is so concise and detailed, I felt it would be a total waste of time to repeat it all here. Besides, there was no way I could do as good a job as they did. So I figured I’d let you head on over to their site to make your dough.
However, you might want to make a mental note that you need to get started the previous day, so your dough has chance to proof overnight, and that you will then need to give your dough a second proofing before you can use it, which will require about an hour this time.
You will also have to make your pizza sauce, either the previous day or while your dough is proofing for the second time. For some reason, I apparently had a major brain malfunction and totally forgot to take pictures of that. Luckily, the process is extremely easy, so I’m sure you’ll make do without the photos.
Also, if you can’t be bothered with making your own sauce, you could buy some off the shelves at your local supermarket. Honestly, there are quite a few decent ones to choose from, out there: this is my personal favoritewhen I’m in a pinch.
When your dough is done proofing for the initial 24 hours, you’ll want to preheat your oven to 550°F and place your pizza stone on the middle rack.
Leave your stone in there for about an hour so it has a chance to fully preheat. Like I said, cooking that pizza on a super hot stone is the secret to getting that crust baked to crispy perfection!
And while your stone is busy getting hot, get your pizza dough ready for its second proofing (this process won’t take long, really… just a few minutes at most!)
While the dough is proofing for the second time and the stone is heating up, prep your garnish and par-cook your bacon: cut it into 1½” chunks and cook it until soft and chewy. I find a good way to do this is to throw it into a broiler pan and then place that pan directly onto your hot pizza stone for 2 to 3 minutes.
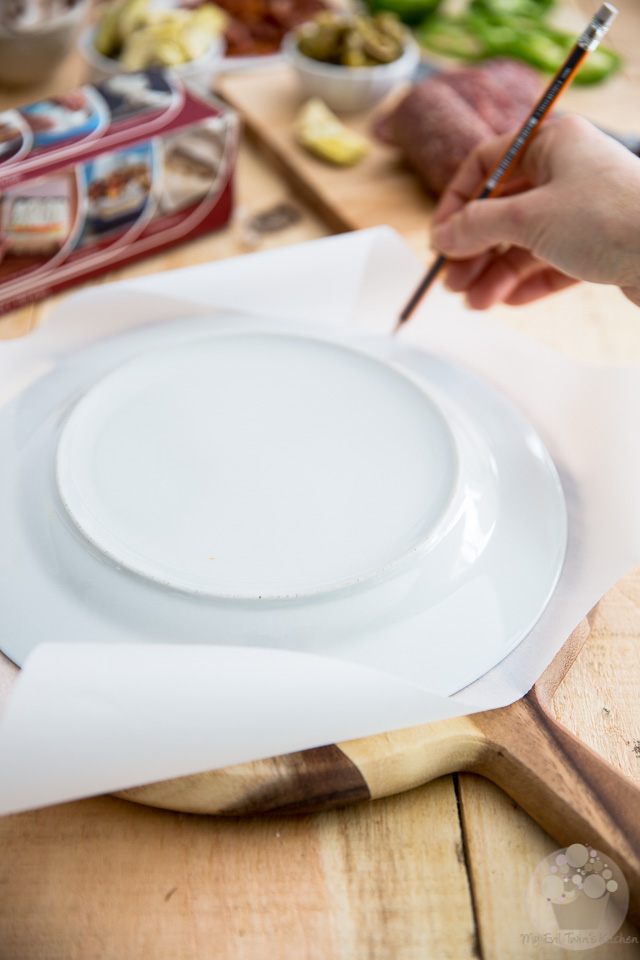
Next, use a large round dinner plate to trace 2 circles on parchment paper. You’ll be using these to place under your pizzas and ensure that they won’t stick to your pizza peel as you slide them onto the pizza stone.
You could also dust your peel with lots and lots of flour, if you preferred, but I find this technique to be much more efficient, not to mention a lot less messy!
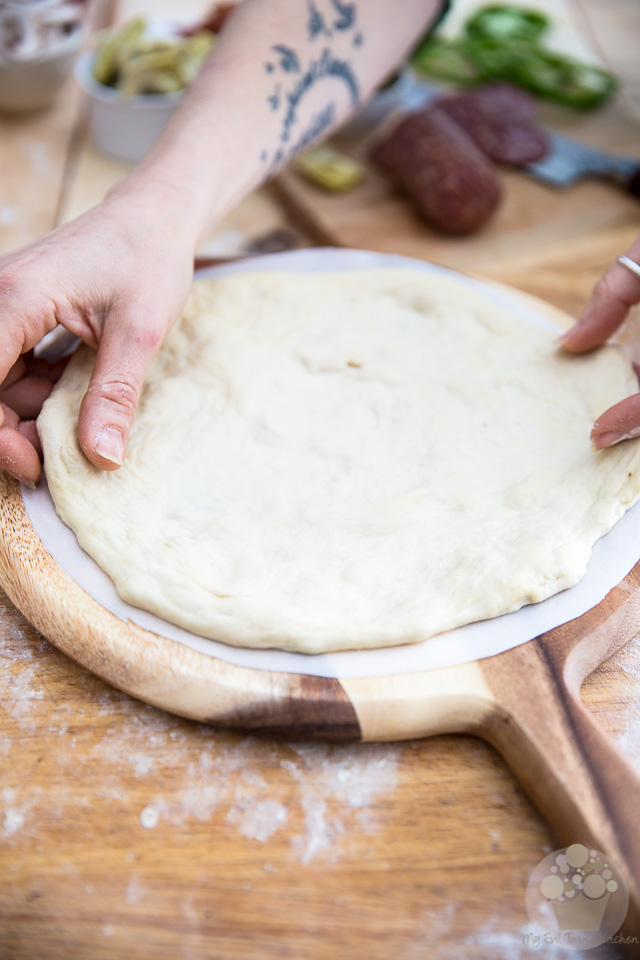
When your pizza dough is done proofing for the second time, delicately stretch each ball with your fingers until it’s approximately 10″ in diameter and then move the discs onto your prepared parchment paper circles.
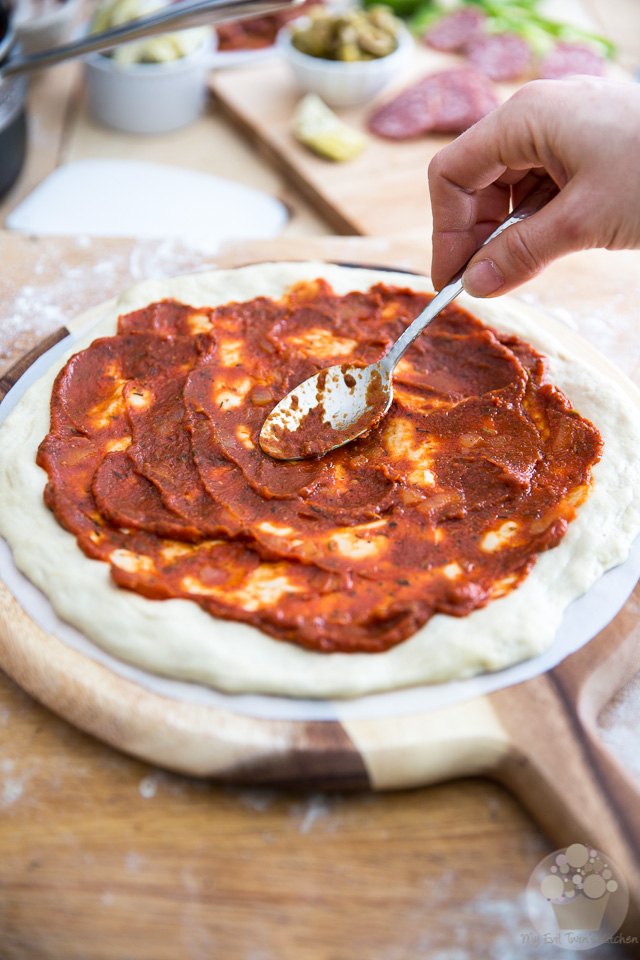
Divide the sauce between both discs and spread it in a thin even layer, not quite all the way to the edge.
Make sure you don’t use too much sauce, as this would only end up making your dough soggy, and would most probably cause your precious toppings to slide off your pie.
A thin layer is all it takes!
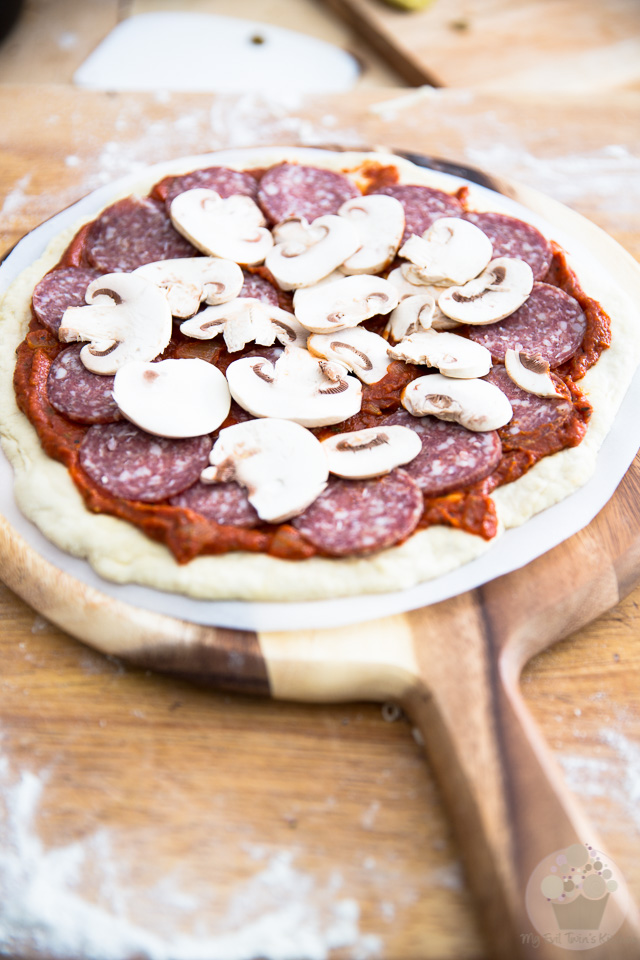
Top with the salami and sliced mushrooms…
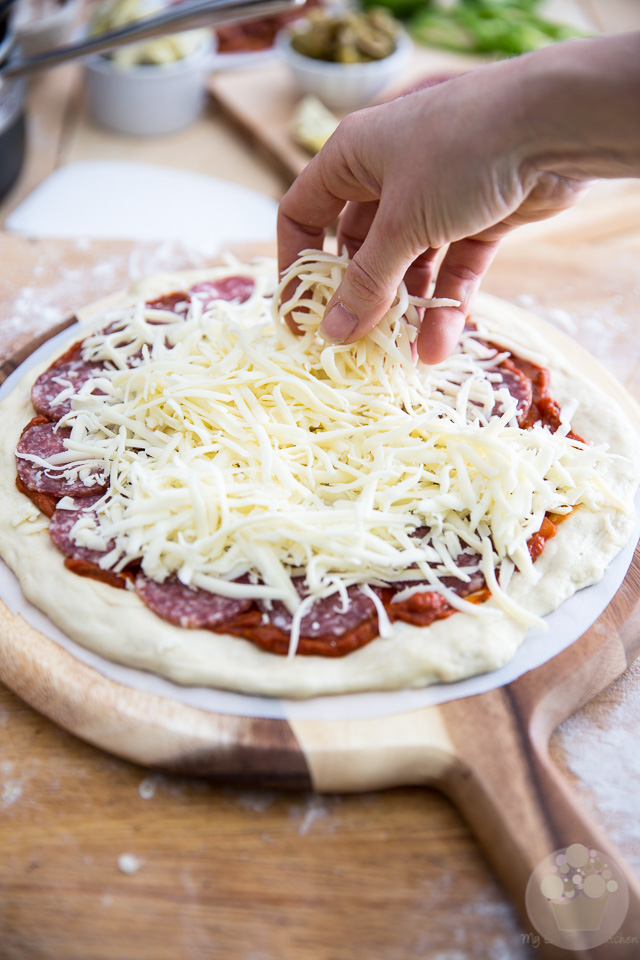
followed with a generous amount of grated cheese.
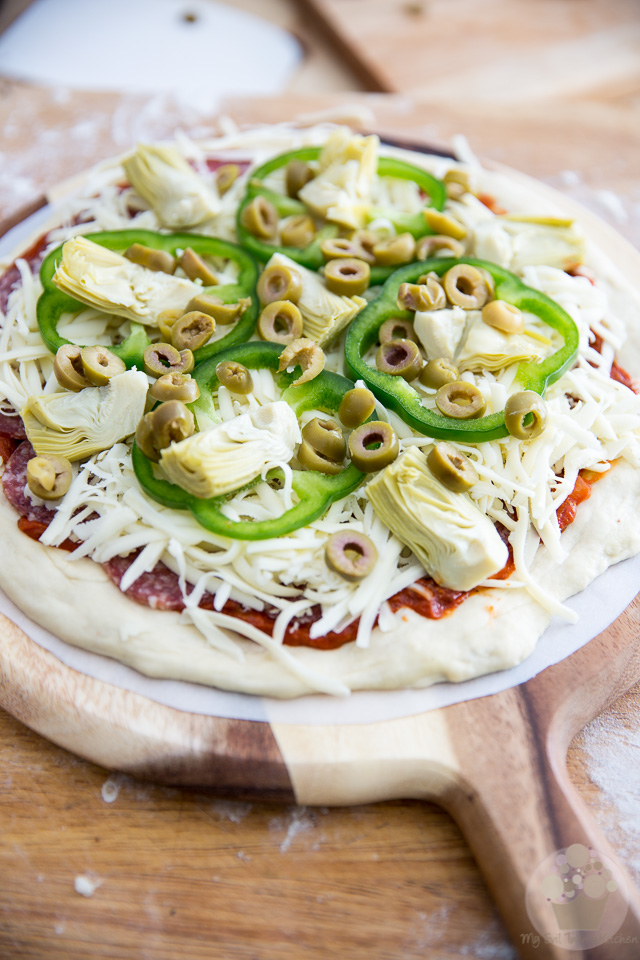
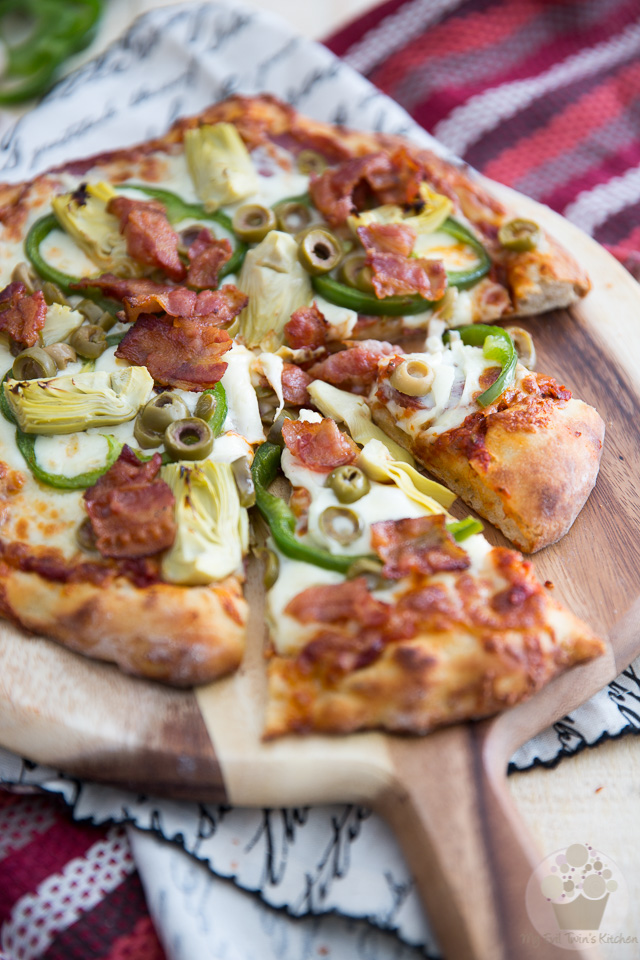
Finish with the sliced bell peppers, quartered artichokes and sliced green olives.
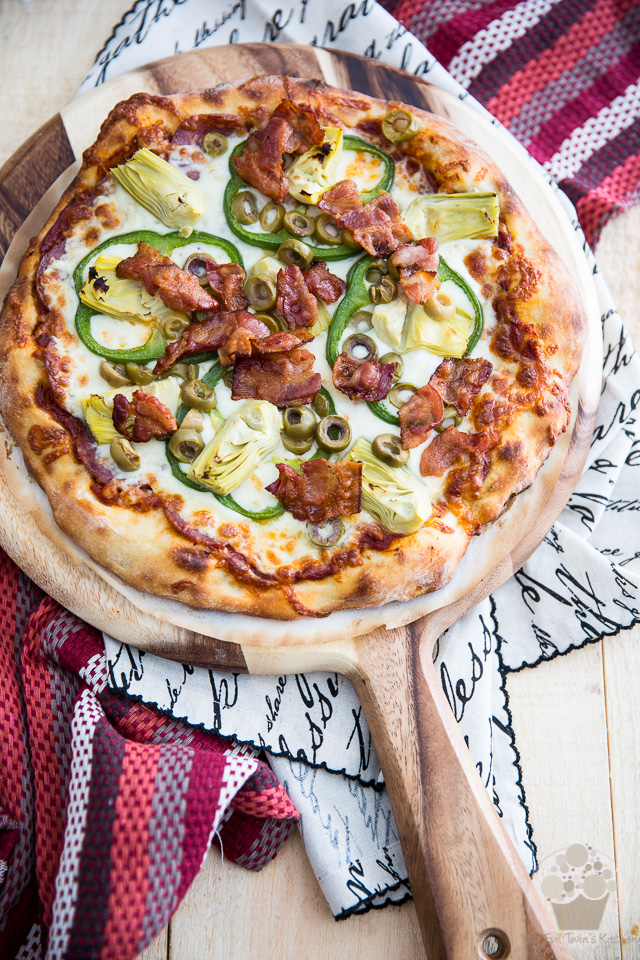
Delicately slide the pizzas (with the parchment paper) onto the preheated pizza stone and cook until the crust is poofy and brown and appears nice and crunchy, and the cheese is fully melted and starts to brown and bubble around the edges, about 8 minutes.
Oh, and when there is about one minute left of cooking time, add the bacon so it has a chance to crisp up. One minute is all it takes, really. If you were to add it too soon, it would simply end up burning.
Likewise, if you were to add it raw with the rest of the garnish, it would release all of its grease right on top of your pizza. Personally, I’m not a fan of greasy pizza, but if you don’t mind it, you can always go with that option!
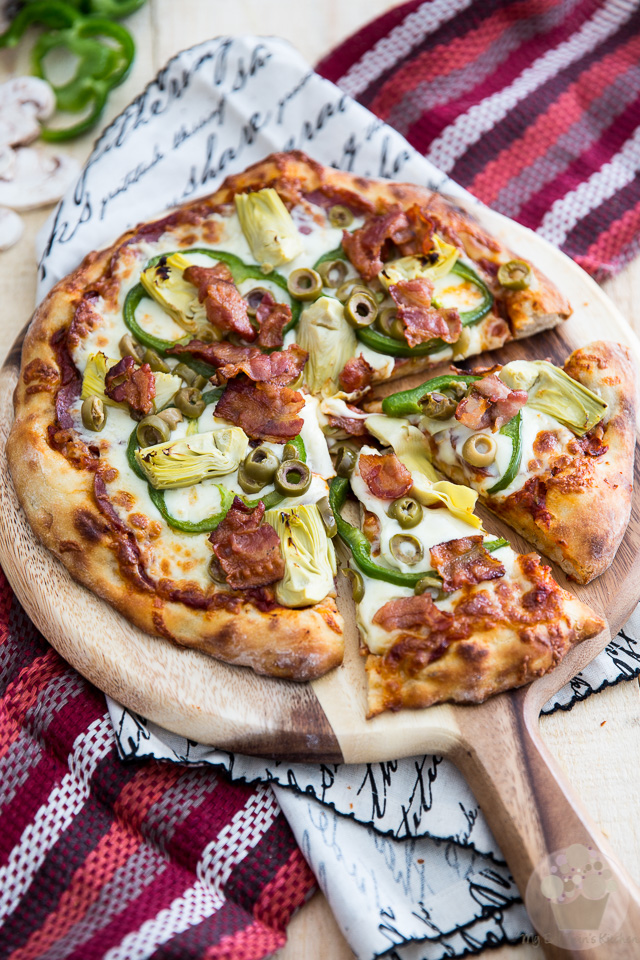
Finally, we’re ready to eat! Will you look at that crust!!!
Now that’s what I’m talking about. That’s pizza crust perfection right there, if you ask me.
Frankly, I think they’re something particularly rewarding about making your own pizza, especially when it’s that good.
I can’t wait to repeat the experience.
LOVE IT? SHARE IT!


No comments: